Apple Mtp Usb Device Driver For Mac
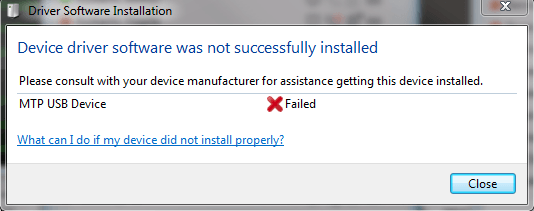
After modifying access rights (gave SYSTEM and me full access) I was able to update the MTP USB driver to the actual Apple Mobile Device Support driver. Subsequently I was able to install iTunes without any issues when installing the AMDS driver. Took me just 4 days to the hint with looking into the log files mentioned above.-Cheers.
This chapter describes how to develop a user-space tool that finds and communicates with an attached USB device and one of its interfaces.
Important: The sample code featured in this document is intended to illustrate how to access a USB device from an application. It is not intended to provide guidance on error handling and other features required for production-quality code.
Using USB Device Interfaces
Applications running in OS X get access to USB devices by using I/O Kit functions to acquire a device interface, a type of plug-in that specifies functions the application can call to communicate with the device. The USB family provides two types of device interface:
IOUSBDeviceInterfacefor communicating with the device itselfIOUSBInterfaceInterfacefor communicating with an interface in the device
Both device interfaces are defined in /System/Library/Frameworks/IOKit.framework/Headers/usb/IOUSBLib.h.
Communicating with the device itself is usually only necessary when you need to set or change its configuration. For example, vendor-specific devices are often not configured because there are no default drivers that set a particular configuration. In this case, your application must use the device interface for the device to set the configuration it needs so the interfaces become available.
Important: If your application is sandboxed, it must request the com.apple.security.device.usb entitlement in order to access USB devices.
The process of finding and communicating with a USB device is divided into two sets of steps. The first set outlines how to find a USB device, acquire a device interface of type IOUSBDeviceInterface for it, and set or change its configuration. The second set describes how to find an interface in a device, acquire a device interface of type IOUSBInterfaceInterface for it, and use it to communicate with that interface. If you need to communicate with an unconfigured device or if you need to change a device’s configuration, you follow both sets of steps. If you need to communicate with a device that is already configured to your specification, you follow only the second set of steps. The sample code in Accessing a USB Device follows both sets of steps and extends them to include setting up notifications it can receive when devices are dynamically added or removed.
Follow this first set of steps only to set or change the configuration of a device. If the device you’re interested in is already configured for your needs, skip these steps and follow the second set of steps.
Find the
IOUSBDeviceobject that represents the device in the I/O Registry. This includes setting up a matching dictionary with a key from the USB Common Class Specification (see Finding USB Devices and Interfaces). The sample code uses the key elementskUSBVendorNameandkUSBProductNameto find a particular USB device (this is the second key listed in Table 1-2).Create a device interface of type
IOUSBDeviceInterfacefor the device. This device interface provides functions that perform tasks such as setting or changing the configuration of the device, getting information about the device, and resetting the device.Examine the device’s configurations with
GetConfigurationDescriptorPtr, choose the appropriate one, and callSetConfigurationto set the device’s configuration and instantiate theIOUSBInterfaceobjects for that configuration.
Follow this second set of steps to find and choose an interface, acquire a device interface for it, and communicate with the device.
Create an interface iterator to iterate over the available interfaces.
Toronto gothic font download free. OnlineWebFonts.COM is Internet most popular font online download website,offers more than 8,000,000 desktop and Web font products for you to preview and download. Download Popular Fonts. The 10 most popular fonts right now. Toronto Gothic Comments. The best website for free high-quality Toronto Gothic fonts, with 25 free Toronto Gothic fonts for immediate download, and 1 professional Toronto Gothic fonts for the best price on the Web. Toronto Gothic Regular Free Download. OnlineWebFonts.COM is Internet most popular font online download website,offers more than 8,000,000 desktop and Web font products for you to preview and download. Font All Free. Download Toronto Gothic Font. Free Font Download: Toronto Gothic TrueType Font Download Free Toronto Gothic Font (43 KB) Toronto Gothic Font Custom Preview Tool. Enter some text in the box below, then click the preview button. (Cookies must be enabled in your browser.) Share Toronto Gothic Free Font.
Create a device interface for each interface so you can examine its properties and select the appropriate one. To do this, you create a device interface of type
IOUSBInterfaceInterface. This device interface provides functions that perform tasks such as getting information about the interface, setting the interface’s alternate setting, and accessing its pipes.Use the
USBInterfaceOpenfunction to open the selected interface. This will cause the pipes associated with the interface to be instantiated so you can examine the properties of each and select the appropriate one.Communicate with the device through the selected pipe. You can write to and read from the pipe synchronously or asynchronously—the sample code in Accessing a USB Device shows how to do both.
Vedic Astrology Simply Put is a colorful, fun, and simplified entry into the mysterious and captivating world of Vedic Astrology, called Jyotish in India. Levacy, an astrologer with more than two decades of experience, offers beautifully rendered illustrations and text to ease your understanding of this ancient system of behavior. Lessons on Vedic Astrology – Volume II 4 Dedication We dedicate these efforts at the feet of our Jyotish Guru Sri. Narasimha Rao who is relentlessly working to spread the Vedic Astrology knowledge and selflessly conducting the Vedic Astrology classes in Boston, USA. Download The Secret of Vedic Astrology Nakshatra. Share & Embed 'The Secret of Vedic Astrology Nakshatra' Please copy and paste this embed script to where you want to embed. Astrology workbook pdf. Scholars of Vedic astrology, like Neelakantha and Dr. When we rely on finer techniques of Vedic astrology – such as divisional charts and special lagnas – for finer predictions, it is crucial to have an accurate birthtime. The chapter “Impact of Birthtime Error” shows how to cope with birthtime inaccuracies. The Mystery of the Zodiac by Ernst Wilhelm www.vedic-astrology.net The path of the Sun, which is known as the ecliptic is divided into twelve divisions of thirty degrees each. The common Sanskrit word for one of these divisions is a Rasi. Rasi means “a group, a quantity, a mass, etc.” In the context of astrology, as well as in.
Accessing a USB Device
This section provides snippets of sample code that show how to access a Cypress EZ-USB chip with an 8051 microcontroller core. The sample code follows the first set of steps in section Using USB Device Interfaces to find the Cypress EZ-USB chip in its default, unprogrammed state (also referred to as the “raw device”). It then configures the device and downloads firmware provided by Cypress to program the chip to behave as a device that echoes all information it receives on its bulk out pipe to its bulk in pipe.
Once the chip has been programmed, the device nub representing the default, unprogrammed device is detached from the I/O Registry and a new device nub, representing the programmed chip, is attached. To communicate with the programmed chip (also referred to as the “bulk test device”), the sample code must perform the first set of steps again to find the device, create a device interface for it, and configure it. Then it performs the second set of steps to find an interface, create a device interface for it, and test the device. The sample code also shows how to set up notifications for the dynamic addition and removal of a device.
Important: If your application is sandboxed, it must request the com.apple.security.device.usb entitlement in order to access USB devices.
Definitions and Global Variables
The code in the USB Notification Example uses the definitions and global variables shown in Listing 2-1. The definition of USE_ASYNC_IO allows you to choose to use either synchronous or asynchronous calls to read from and write to the chip by commenting out the line or leaving it in, respectively. The definition of kTestMessage sets up a simple message to write to the device. The remaining definitions are specific to the Cypress EZ-USB chip.
Listing 2-1 Definitions and global variables
The main Function
The main function in the USB Notification Example project (contained in the file main.c) accomplishes the following tasks.
It establishes communication with the I/O Kit and sets up a matching dictionary to find the Cypress EZ-USB chip.
It sets up an asynchronous notification to be called when an unprogrammed (raw) device is first attached to the I/O Registry and another to be called when the device is removed.
It modifies the matching dictionary to find the programmed (bulk test) device.
It sets up additional notifications to be called when the bulk test device is first attached or removed.
It starts the run loop so the notifications that have been set up will be received.
The main function uses I/O Kit functions to set up and modify a matching dictionary and set up notifications, and Core Foundation functions to set up the run loop for receiving the notifications. It calls the following functions to access both the raw device and the bulk test device.
RawDeviceAdded, shown in Listing 2-3, iterates over the set of matching devices and creates a device interface for each one. It callsConfigureDevice(shown in Listing 2-5) to set the device’s configuration, and thenDownloadToDevice(shown in Listing 2-6) to download the firmware to program it.RawDeviceRemoved, shown in Listing 2-4, iterates over the set of matching devices and releases each one in turn.BulkTestDeviceAdded, shown in Listing 2-7, iterates over the new set of matching devices, creates a device interface for each one, and callsConfigureDevice(shown in Listing 2-5) to set the device’s configuration. It then callsFindInterfaces(shown in Listing 2-8) to get access to the interfaces on the device.BulkTestDeviceRemovediterates over the new set of matching devices and releases each one in turn. This function is not shown in this chapter; seeRawDeviceRemoved(Listing 2-4) for a nearly identical function.
Listing 2-2 The main function
Working With the Raw Device
Now that you’ve obtained an iterator for a set of matching devices, you can use it to gain access to each raw device, configure it, and download the appropriate firmware to it. The function RawDeviceAdded (shown in Listing 2-3) uses I/O Kit functions to create a device interface for each device and then calls the following functions to configure the device and download firmware to it.
ConfigureDevice, shown in Listing 2-5, uses device interface functions to get the number of configurations, examine the first one, and set the device’s configuration.DownloadToDevice, shown in Listing 2-6, downloads the firmware inbulktest.cto the device.

Listing 2-3 Accessing and programming the raw device
The function RawDeviceRemoved simply uses the iterator obtained from the main function (shown in Listing 2-2) to release each device object. This also has the effect of arming the raw device termination notification so it will notify the program of future device removals. RawDeviceRemoved is shown in Listing 2-4.
Listing 2-4 Releasing the raw device objects
Although every USB device has one or more configurations, unless the device is a composite class device that’s been matched by the AppleUSBComposite driver which automatically sets the first configuration, none of those configurations may have been set. Therefore, your application may have to use device interface functions to get the appropriate configuration value and use it to set the device’s configuration. In the sample code, the function ConfigureDevice (shown in Listing 2-5) accomplishes this task. In fact, it is called twice: once by RawDeviceAdded to configure the raw device and again by BulkTestDeviceAdded (shown in Listing 2-7) to configure the bulk test device.
Listing 2-5 Configuring a USB device
Now that the device is configured, you can download firmware to it. Cypress makes firmware available to program the EZ-USB chip to emulate different devices. The sample code in this document uses firmware that programs the chip to be a bulk test device, a device that takes the data it receives from its bulk out pipe and echoes it to its bulk in pipe. The firmware, contained in the file bulktest.c, is an array of INTEL_HEX_RECORD structures (defined in the file hex2c.h).
The function DownloadToDevice uses the function WriteToDevice (shown together in Listing 2-6) to prepare the device to receive the download and then to write information from each structure to the appropriate address on the device. When all the firmware has been downloaded, DownloadToDevice calls WriteToDevice a last time to inform the device that the download is complete. At this point, the raw device detaches itself from the bus and reattaches as a bulk test device. This causes the device nub representing the raw device to be removed from the I/O Registry and a new device nub, representing the bulk test device, to be attached.
Listing 2-6 Two functions to download firmware to the raw device
Working With the Bulk Test Device
After you download the firmware to the device, the raw device is no longer attached to the bus. To gain access to the bulk test device, you repeat most of the same steps you used to get access to the raw device.
Use the iterator obtained by a call to
IOServiceAddMatchingNotificationin themainfunction (shown in Listing 2-2) to iterate over a set of matching devices.Create a device interface for each device.
Configure the device.
This time, however, the next step is to find the interfaces on the device so you can choose the appropriate one and get access to its pipes. Because of the similarities of these tasks, the function BulkTestDeviceAdded follows the same outline of the RawDeviceAdded function except that instead of downloading firmware to the device, it calls FindInterfaces (shown in Listing 2-8) to examine the available interfaces and their pipes. The code in Listing 2-7 replaces most of the BulkTestDeviceAdded function’s code with comments, focusing on the differences between it and the RawDeviceAdded function.
Listing 2-7 Accessing the bulk test device
The function BulkTestDeviceRemoved simply uses the iterator obtained from the main function (shown in Listing 2-2) to release each device object. This also has the effect of arming the bulk test device termination notification so it will notify the program of future device removals.The BulkTestDeviceRemoved function is identical to the RawDeviceRemoved function (shown in Listing 2-4), with the exception of the wording of the printed error statement.
Working With Interfaces
Now that you’ve configured the device, you have access to its interfaces. The FindInterfaces function (shown in Listing 2-8) creates an iterator to iterate over all interfaces on the device and then creates a device interface to communicate with each one. For each interface found, the function opens the interface, determines how many endpoints (or pipes) it has, and prints out the properties of each pipe. Because opening an interface causes its pipes to be instantiated, you can get access to any pipe by using its pipe index. The pipe index is the number of the pipe within the interface, ranging from one to the number of endpoints returned by GetNumEndpoints. You can communicate with the default control pipe (described in USB Transfer Types) from any interface by using pipe index 0, but it is usually better to use the device interface functions for the device itself (see the use of IOUSBDeviceInterface functions in Listing 2-5).
The sample code employs conditional compilation using #ifdef and #ifndef to demonstrate both synchronous and asynchronous I/O. If you’ve chosen to test synchronous I/O, FindInterfaces writes the test message (defined in Listing 2-1) to pipe index 2 on the device and reads its echo before returning. For asynchronous I/O, FindInterfaces first creates an event source and adds it to the run loop created by the main function (shown in Listing 2-2). It then sets up an asynchronous write and read that will cause a notification to be sent upon completion. The completion functions WriteCompletion and ReadCompletion are shown together in Listing 2-9.
Listing 2-8 Finding interfaces on the bulk test device
When an asynchronous write action is complete, the WriteCompletion function is called by the notification. WriteCompletion then calls the interface function ReadPipeAsync to perform an asynchronous read from the pipe. When the read is complete, control passes to ReadCompletion which simply prints status messages and adds a NULL termination to the global buffer containing the test message read from the device. The WriteCompletion and ReadCompletion functions are shown together in Listing 2-9.
Listing 2-9 Two asynchronous I/O completion functions
Copyright © 2002, 2012 Apple Inc. All Rights Reserved. Terms of Use Privacy Policy Updated: 2012-01-09
Type: driver
Date: 2011/11/10
Language: english
Version: 1.6.49190
Size: 2.5MB
Platform: Mac OSX
USB MIDI Drivers and ClockWorks for Mac OS X
This installer package (version 1.6.49190) installs updated Mac OS X drivers for all MOTU USB MIDI interfaces, including the USB FastLane, micro lite, MIDI express 128, micro express, MIDI Express XT, and MIDI Timepiece AV. Includes a completely rewritten, Intel-native version of ClockWorks for the MIDI Timepiece AV, MIDI Express XT, micro express and Digital Timepiece. Mac OS X 10.5.8 or later is recommended. Supports Mac OS X 10.8 (Mountain Lion).
To install: unzip archive and double-click installer.
Type: driver
Date: 2011/08/09
Language: english
Version: 4.0.48697
Size: 29.6MB
Platform: Windows XP, Windows XP Pro, Windows Vista 32-bit, Windows Vista 64-bit, Windows 7 32-bit, Windows 7 64-bit, Windows 8 32-bit, Windows 8 64-bit
USB MIDI Installer for Windows
This installer (version 4.0.48697) installs updated drivers for Windows 7, Vista, and XP for all MOTU USB MIDI interfaces, including the USB FastLane, micro lite, MIDI express 128, micro express, MIDI Express XT, and MIDI Timepiece AV. Includes a completely rewritten version of ClockWorks for the MIDI Timepiece AV, MIDI Express XT, micro express and Digital Timepiece. 32-bit and 64-bit PC systems are supported. The minimum required legacy Windows versions are Vista SP2 and XP SP3.
Extract the contents of the ZIP archive to access and run the 'Setup.exe' installer program. The extracted folder contains a README file with installation instructions.
Type: driver
Date: 2010/01/12
Language: english
Version: 1.5.37320
Size: 1.9MB
Platform: Mac OSX
USB MIDI OSX Drivers and ClockWorks for OSX 10.4
This installer includes USB MIDI Drivers for Mac OS X for use with MOTU USB interfaces including the USB Fastlane, micro lite, express 128, micro express, Express XT and MIDI Timepiece AV. The install also contains the ClockWorks software console. Use this installer if you are running OSX 10.4.
To install: unzip archive and double-click installer.
Type: driver
Date: 2010/01/01
Language: english
Version: 1.37
Size: 1.8MB
Platform: Mac OSX
USB MIDI OSX Drivers and ClockWorks for OSX 10.3
This installer includes USB MIDI Drivers for Mac OS X for use with MOTU USB interfaces including the USB Fastlane, micro lite, express 128, micro express, Express XT and MIDI Timepiece AV. The install also contains the ClockWorks software console. Use this installer if you are running OSX 10.3.
To install: unzip archive and double-click installer.
Type: driver
Date: 2004/09/22
Language: english
Version: 2.51
Size: 1.9MB
Platform: Windows XP, Windows 2000, Windows ME
WDM MIDI Drivers for MOTU USB and Parallel Interfaces
WDM Drivers for MOTU USB compatible with all MOTU USB & parallel MIDI interfaces including Fastlane, mico lite, Express 128, micro express, Express XT and MTP AV. USB drivers are Windows ME, 2000 and XP compatible. Clockworks DTP support has been recently added. Refer to Clockworks manual link below.
Unzip and run installer.
Type: application
Date: 2003/11/05
Language: english
Version: 1.48
Size: 4.8MB
Platform: Mac OS9
FreeMIDI 1.48/USB MIDI Installer
This is the FreeMIDI installer for Mac OS9. This install contains drivers and consoles for all MOTU MIDI interfaces, serial and USB.
Double-click to install.
Type:
Date: 2000/11/28
Language:
Version:
Size: 0.0MB
Platform:
MIDIEx .SYX file loader profile
This Unisyn profile will open a .SYX format file and send the data to a selectable FreeMIDI device. At that point, you can use the proper Unisyn device profile to get the data back and you have converted the .SYX file into a Unisyn bank. <br><br>To open a .SYX file, the file must have .SYX appended to the file name and yes, it must be in all uppercase letters.<br><br>This profile is an UNSUPPORTED extra. Requests to tech support regarding this profile will be cheerfully ignored. The normal liability caveats written inside the front cover of your Unisyn manual apply. In short, you’re on your own. Enjoy!<br>
Type: driver
Date: 2000/11/20
Language: english
Version: 1.0
Size: 0.32MB
Platform: Windows 98
Windows 98 USB Driver Install for MIDI Timepiece AV
This USB Driver install is compatible with Windows-updated hardware. Windows-updated hardware contain 'M/W' indicators on the bottom of the USB MTP AV. Hardware packaged specifically for Macintosh requires the updated ROM chip. Click link below to order.
This driver is compatible with Windows 98 (2nd Edition recommended), and Windows Me.
Run MotuUSB.exe archive to expand install folder named 'USB Driver Install' Connect your USB MIDI interface and power on. Hardware Wizard will detect new device. Add USB Composite device and search the 'USB Driver Install' folder for driver.
Type: application
Date: 2000/09/28
Language: english
Version: 1.07
Size: 1.3MB
Platform: Mac OS9
ClockWorks 1.07 Console Only
ClockWorks console for all MOTU interfaces for the Mac
Copy console to hard drive.
Type: driver
Date: 1998/03/20
Language: english
Version: 1.11/1.04
Size: 0.54MB
Platform: Windows 98
MIDI Timepiece AV Console and Driver
MTP AV Parallel installer for Windows 95 and 98.
If you want the console and driver for your MIDI Timepiece AV, this download is all you'll need. This self-extracting file contains the Windows console program (v1.10) and driver (v1.04) for the MIDI Timepiece AV. This update console adds Quicklock support as well as display improvements.
To properly expand the MIDI Timepiece AV Setup files you must place /d after the command to run mxpcn_se.exe . So, if the file is in a folder on the C drive called console, the command to properly expand the files would be c:consoleavcon_se.exe /d
Once you have retrieved and decompressed this download, read the README.WRI file and run SETUP.EXE.
Type: driver
Date: 1998/03/20
Language: english
Version: 1.0
Size: 0.56MB
Platform: Windows ME, Windows 98
micro express Driver (Parallel)
This is the original parallel 95/98/ME drivers for the micro.
Double-click to install.
Type: driver
Date: 1998/03/20
Language: english
Version: 1.02
Size: 0.56MB
Platform: Windows 98
MIDI Express XT Console and Driver
This self-extracting file contains the version 1.02 of the MIDI Express XT console program and driver.
IMPORTANT: to properly expand the MIDI Express XT Setup files you must place /d after the command to run xtcon_se.exe . So, if the file is in a folder on the C drive called console, the command to properly expand the files would be c:consolextcon_se.exe /d
Type: application
Date: 1997/11/27
Language: english
Version: 2.03
Size: 0.38MB
Platform: Mac OS9
Express MTP Console
(compatible with MIDI Timepiece I, II or AV serial and requires FreeMIDI)
Expand and copy console to hard drive.
Type: driver
Date: 1997/10/31
Language: english
Version: 1.1
Size: 0.7MB
Platform: Windows 98
MIDI Express PC console and all drivers
This self-extracting file contains the latest version of the Windows console program for the MIDI Express PC. This version of the console can be used with any MIDI Express PC Windows MIDI driver. Included in this download are the latest drivers for the 8-bit and 16-bit MIDI Express PC expansion cards (the same drivers available elsewhere on this page). You do not need to download individual MIDI Express PC driver updates if you download this file.
IMPORTANT: to properly expand the MIDI Express PC Setup files you must place /d after the command to run mxpcn_se.exe . So, if the file is in a folder on the C drive called console, the command to properly expand the files would be c:consolemxpcn_se.exe /d
Once you have retrieved and decompressed this download, read the README.WRI file and run SETUP.EXE.
Type: driver
Date: 1997/10/31
Language: english
Version: 2.13
Size: 0.04MB
Platform: Windows 98
MIDI Express PC (16-bit card) driver
Windows MIDI driver for MIDI Express PC interfaces with 16-bit cards. This driver will not work with any card other than the 16-bit type.
This version of the driver contains MIDI input timing improvements. Also, connecting to the MIDI Express PC and saving/restoring of its internal state during each Windows session have both been made more reliable. Compatibility with 32-bit MIDI programs running on Windows 95 has been improved as well.
IMPORTANT: to properly expand the MIDI Express PC files you must place /d after the command to run mxp16_se.exe . So, if the file is in a folder on the C drive called console, the command to properly expand the files would be c:consolemxp16_se.exe /d
Type: driver
Date: 1997/10/17
Language: english
Version: 1.1
Size: 0.51MB
Platform: Windows 98
MIDI Time Piece II console and all drivers
If you want the console and driver for your MIDI Time Piece II, this download is all you'll need. This self-extracting file contains the latest version of the Windows console program for the MIDI Time Piece II. This version of the console can be used with any MIDI Time Piece II Windows MIDI driver. Included in this download are the latest drivers for the 8-bit, 16-bit and PC Link types of MIDI Time Piece II expansion cards (the same drivers available elsewhere on this page). You do not need to download individual MTP II driver updates if you download this file.
Once you have retrieved and decompressed this download, read the README.WRI file and run SETUP.EXE.
Type: driver
Date: 1997/10/17
Language:
Version: 2.03
Size: 0.06MB
Platform: Windows 98
MIDI Time Piece II (PC Link card) driver
This self-extracting file contains the Windows MIDI driver for MIDI Time Piece II interfaces with PC Link cards. This driver will not work with any card other than the PC Link type. In this version of the driver, compatibility with 32-bit MIDI programs running on Windows 95 has been improved.
Type:
Date: 1997/10/17
Language:
Version: 1.52
Size: 0.04MB
Platform: Windows 98
MIDI Time Piece II (16-bit card) driver
This self-extracting file contains the Windows MIDI driver for MIDI Time Piece II interfaces with 16-bit cards. This driver will not work with any card other than the 16-bit type.
The version of the driver includes more reliable 'networking' of two MIDI Time Piece units for access to additional MIDI ports. Compatibility with 32-bit MIDI programs running on Windows 95 has also been improved.
Type: driver
Date: 1997/10/17
Language:
Version: 1.40
Size: 0.04MB
Platform: Windows 98
MIDI Express PC (8-bit card) driver
Windows MIDI driver for MIDI Express PC interfaces with 8-bit cards. This driver will not work with any card other than the 8-bit type. This driver has been tested with 16- and 32-bit MIDI programs running on Windows 95.
IMPORTANT: to properly expand the MIDI Express PC files you must place /d after the command to run mxp8_se.exe . So, if the file is in a folder on the C drive called console, the command to properly expand the files would be c:consolemxp8_se.exe /d
Type: driver
Date: 1997/10/17
Language:
Version: 1.11/2.03
Size: 0.51MB
Platform: Windows 98
MIDI Express PC Notebook update
console version 1.11 with driver version 2.03
Windows console program for the MIDI Express PC Notebook. This version of the console can be used only with the latest version of the driver, which is included with this download.
This update corrects aspects of the previous version of the console that prevent it from running on Windows 95. Also, driver changes include improved compatibility with 32-bit MIDI programs running on Windows 95. Although it mainly addresses Windows 95 issues, this update is also recommended for Notebook users running Windows 3.1 or Windows for Workgroups.
IMPORTANT: to properly expand the MIDI Express PC files you must place /d after the command to run mxpcn_se.exe . So, if the file is in a folder on the C drive called console, the command to properly expand the files would be c:consolemxpcn_se.exe /d
Once you have retrieved and decompressed this download, read the README.WRI file and run SETUP.EXE.
Type: driver
Date:
Language:
Version: 1.04
Size: 0.06MB
Platform: Windows 98
PC-MIDI Flyer/Pocket Express Driver
This self-extracting file contains the latest version of the Windows MIDI driver for the PC-MIDI Flyer and Pocket Express. This version of the driver improves compatibility with the PC MIDI Flyer under Windows 98. <br><br>IMPORTANT: to properly decompress the necessary files to C:FLYER, simply double-click on the downloaded file and press the Unzip button. Then follow the normal installation<br>procedures. After selecting the Have Disk button, type C:FLYER, and click OK to continue with the installation steps.